How to create any web form in Calculoid – Web calculators case studies #7
With Calculoid you can recreate any conversion form you see on web. In this case study, you will learn how to copy a conversion form web in Calculoid. Fast and simple way.
Nearly 30% of incoming support tickets have the same question: "I found a cool form/calculator is it possible to create the same one with Calculoid? If yes, how?".
We prepared for you a multipurpose how-to flow.
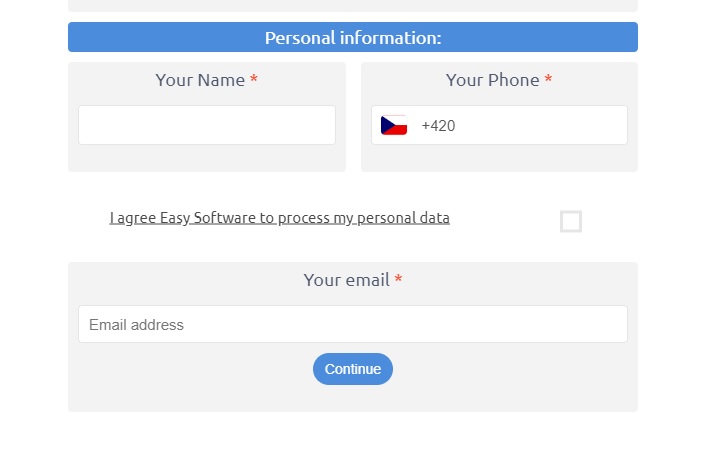
This is one of our forms we wanted to recreate in Calculoid:
Most of the conversion forms on the web consist of:
1. Inputs - fields that allow or force (if required) users to enter data or choose from variables presented. Input can be simple text area, slider, radio box, checkboxes, dropdown.
- Example from the form: All the fields you see in the form are inputs.
2. Results - fields that present you the results or do actions like sending emails, generating quotes, showing you final values.
- Example from the form: As a result, you have a success message and data is sent to another application. In the same way you can generate leads.
3. Formulas and conditions - rules that process entered data in order to present to you the results.
- Example from the form: There are no formulas or special conditions in this form. Only the required fields.
4. Design - once you have all the logic in the form, you want it to look nice and presentable.
How-to flow:
1. Take a look at the form and analyze it. Here are a few questions, which should assist you in this part:
- What should I enter/choose in the form? - These are inputs.
- What do I get as a result? - These are the results.
- How to get those results based on the information I entered? - These are formulas and conditions.
- How does the form look like? Is there any branding? What are the colors? Are there any interactive elements? - Design.
2. Add all the fields with the inputs and results in your calculator.
3. Set those fields. Add names, default values, ext.
4.Set all the formulas and conditions needed.
5. Adjust field sizes and put them in the correct order using drag and drop features.
6. Style your calculator with design settings.
7. Check if the form is ready. You may miss additional small features in the first steps. Check if you need any redirections, hidden fields, links or branding signs/images.
8. Make your calculator finished to generate the two embed codes: HTML and iFrame.
9. Embed your form/calculator on a test page. Check all the functions needed. Then check whether the form suites your web's design.
10. Embed the final version on the desired page.
As you can see the final form has a slightly different layout. When coping a form from web it is not always a good idea to keep it exactly the same. You can make the form better and more presentable by changing a few colors or general layout.


